


Secure Our Serverless APIs
Now that our APIs have been secured with Cognito User Pool and Identity Pool, we are ready to use the authenticated user’s info in our Lambda functions.
Recall that we’ve been hard coding our user ids so far (with user id 123). We’ll need to grab the real user id from the Lambda function event.
Cognito Identity Id
Recall the function signature of a Lambda function:
export async function main(event, context) {}
Or the refactored version that we are using:
export const main = handler(async (event) => {});
So far we’ve used the event object to get the path parameters (event.pathParameters) and request body (event.body).
Now we’ll get the id of the authenticated user.
event.requestContext.authorizer.iam.cognitoIdentity.identityId;
This is an id that’s assigned to our user by our Cognito Identity Pool.
You’ll also recall that so far all of our APIs are hard coded to interact with a single user.
userId: "123", // The id of the author
Let’s change that.
 Replace the above line in
 packages/functions/src/create.js with.
userId: event.requestContext.authorizer.iam.cognitoIdentity.identityId,
Do the same in the packages/functions/src/get.js.
userId: event.requestContext.authorizer.iam.cognitoIdentity.identityId,
And in the packages/functions/src/update.js.
userId: event.requestContext.authorizer.iam.cognitoIdentity.identityId,
In packages/functions/src/delete.js as well.
userId: event.requestContext.authorizer.iam.cognitoIdentity.identityId,
In packages/functions/src/list.js find this line instead.
":userId": "123",
And replace it with.
":userId": event.requestContext.authorizer.iam.cognitoIdentity.identityId,
Also, include event in the function arguments.
export const main = handler(async (event) => {
Keep in mind that the userId above is the Federated Identity id (or Identity Pool user id). This is not the user id that is assigned in our User Pool. If you want to use the user’s User Pool user Id instead, have a look at the Mapping Cognito Identity Id and User Pool Id chapter.
To test these changes we cannot use the curl command anymore. We’ll need to generate a set of authentication headers to make our requests. Let’s do that next.
Test the APIs
Let’s quickly test our APIs with authentication.
To be able to hit our API endpoints securely, we need to follow these steps.
- Authenticate against our User Pool and acquire a user token.
- With the user token get temporary IAM credentials from our Identity Pool.
- Use the IAM credentials to sign our API request with Signature Version 4.
These steps can be a bit tricky to do by hand. So we created a simple tool called AWS API Gateway Test CLI.
You can run it using.
$ npx aws-api-gateway-cli-test \
--username='admin@example.com' \
--password='Passw0rd!' \
--user-pool-id='USER_POOL_ID' \
--app-client-id='USER_POOL_CLIENT_ID' \
--cognito-region='COGNITO_REGION' \
--identity-pool-id='IDENTITY_POOL_ID' \
--invoke-url='API_ENDPOINT' \
--api-gateway-region='API_REGION' \
--path-template='/notes' \
--method='POST' \
--body='{"content":"hello world","attachment":"hello.jpg"}'
We need to pass in quite a bit of our info to complete the above steps.
- Use the username and password of the user created above.
- Replace
USER_POOL_ID,USER_POOL_CLIENT_ID,COGNITO_REGION, andIDENTITY_POOL_IDwith theUserPoolId,UserPoolClientId,Region, andIdentityPoolIdfrom our previous chapter. - Replace the
API_ENDPOINTwith theApiEndpointfrom our API stack outputs. - And for the
API_REGIONyou can use the sameRegionas we used above. Since our entire app is deployed to the same region.
While this might look intimidating, just keep in mind that behind the scenes all we are doing is generating some security headers before making a basic HTTP request. We won’t need to do this when we connect from our React.js app.
If you are on Windows, use the command below. The space between each option is very important.
$ npx aws-api-gateway-cli-test --username admin@example.com --password Passw0rd! --user-pool-id USER_POOL_ID --app-client-id USER_POOL_CLIENT_ID --cognito-region COGNITO_REGION --identity-pool-id IDENTITY_POOL_ID --invoke-url API_ENDPOINT --api-gateway-region API_REGION --path-template /notes --method POST --body "{\"content\":\"hello world\",\"attachment\":\"hello.jpg\"}"
If the command is successful, the response will look similar to this.
Authenticating with User Pool
Getting temporary credentials
Making API request
{
status: 200,
statusText: 'OK',
data: {
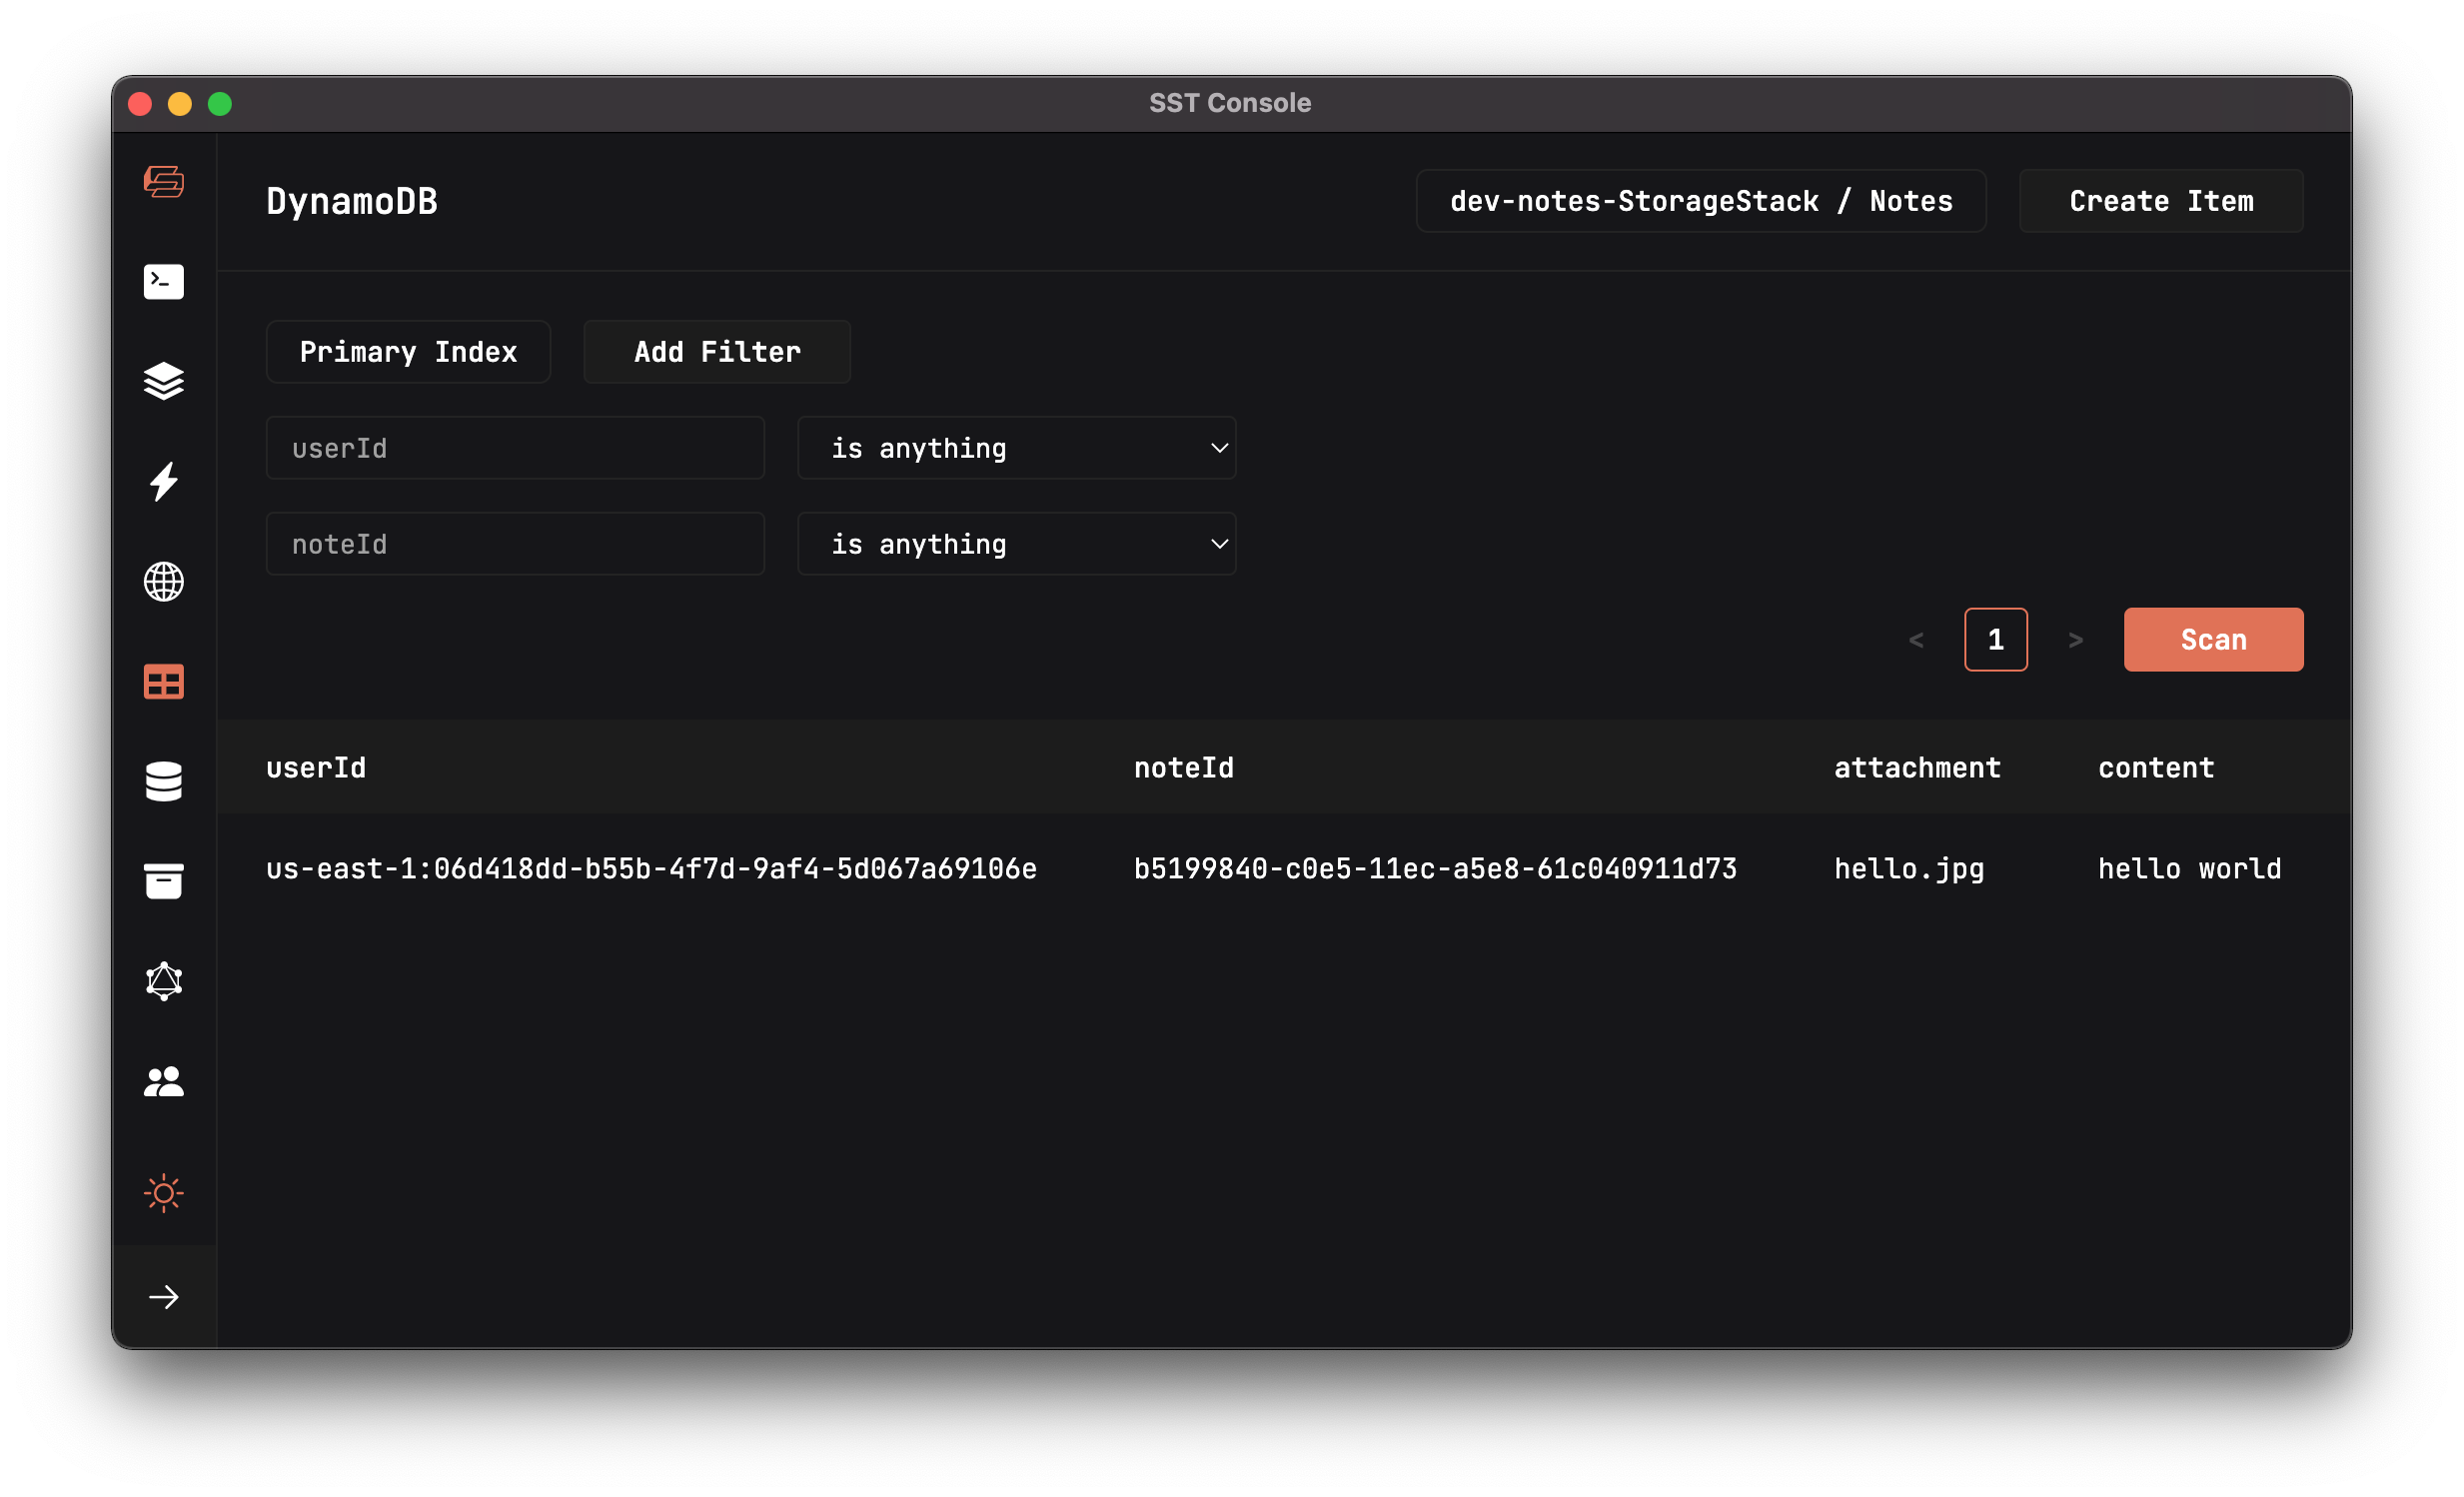
userId: 'us-east-1:06d418dd-b55b-4f7d-9af4-5d067a69106e',
noteId: 'b5199840-c0e5-11ec-a5e8-61c040911d73',
content: 'hello world',
attachment: 'hello.jpg',
createdAt: 1650485336004
}
}
It’ll have created a new note for our test user in the DynamoDB tab of the SST Console.
Commit the Changes
Let’s commit and push our changes to GitHub.
$ git add .
$ git commit -m "Securing the API"
$ git push
We’ve now got a serverless API that’s secure and handles user authentication. In the next section we are going to look at how we can work with 3rd party APIs in serverless. And how to handle secrets!
For help and discussion
Comments on this chapter