


Add an API to Create a Note
Let’s get started by creating the API for our notes app.
We’ll first add an API to create a note. This API will take the note object as the input and store it in the database with a new id. The note object will contain the content field (the content of the note) and an attachment field (the URL to the uploaded file).
Creating a Stack
 Create a new file in
 stacks/ApiStack.js and add the following.
import { Api, use } from "sst/constructs";
import { StorageStack } from "./StorageStack";

export function ApiStack({ stack, app }) {
  const { table } = use(StorageStack);

  // Create the API
  const api = new Api(stack, "Api", {
    defaults: {
      function: {
        bind: [table],
      },
    },
    routes: {
      "POST /notes": "packages/functions/src/create.main",
    },
  });

  // Show the API endpoint in the output
  stack.addOutputs({
    ApiEndpoint: api.url,
  });

  // Return the API resource
  return {
    api,
  };
}
We are doing a couple of things of note here.
-
We are creating a new stack for our API. We could’ve used the stack we had previously created for DynamoDB and S3. But this is a good way to talk about how to share resources between stacks.
-
This new
ApiStackreferences thetableresource from theStorageStackthat we created previously. -
We are creating an API using SST’s
Apiconstruct. -
We are binding our DynamoDB table to our API using the
bindprop. This will allow our API to access our table. -
The first route we are adding to our API is the
POST /notesroute. It’ll be used to create a note. -
Finally, we are printing out the URL of our API as an output by calling
stack.addOutputs. We are also exposing the API publicly so we can refer to it in other stacks.
Adding to the App
Let’s add this new stack to the rest of our app.
In sst.config.ts, import the API stack at the top.
import { ApiStack } from "./stacks/ApiStack";
And, replace the stacks function with -
stacks(app) {
  app.stack(StorageStack).stack(ApiStack);
},
Add the Function
Now let’s add the function that’ll be creating our note.
Create a new file in packages/functions/src/create.js with the following.
import * as uuid from "uuid";
import AWS from "aws-sdk";
import { Table } from "sst/node/table";

const dynamoDb = new AWS.DynamoDB.DocumentClient();

export async function main(event) {
  // Request body is passed in as a JSON encoded string in 'event.body'
  const data = JSON.parse(event.body);

  const params = {
    TableName: Table.Notes.tableName,
    Item: {
      // The attributes of the item to be created
      userId: "123", // The id of the author
      noteId: uuid.v1(), // A unique uuid
      content: data.content, // Parsed from request body
      attachment: data.attachment, // Parsed from request body
      createdAt: Date.now(), // Current Unix timestamp
    },
  };

  try {
    await dynamoDb.put(params).promise();

    return {
      statusCode: 200,
      body: JSON.stringify(params.Item),
    };
  } catch (e) {
    return {
      statusCode: 500,
      body: JSON.stringify({ error: e.message }),
    };
  }
}
There are some helpful comments in the code but let’s go over them quickly.
- Parse the input from the
event.body. This represents the HTTP request body. - It contains the contents of the note, as a string —
content. - It also contains an
attachment, if one exists. It’s the filename of a file that will be uploaded to our S3 bucket. - We can access the our DynamoDB table through
Table.Notes.tableNamefrom thesst/node/table, the SST Node.js client. HereNotesinTable.Notesis the name of our Table construct from the Create a DynamoDB Table in SST chapter. By doingbind: [table]earlier in this chapter, we are allowing our API to access our table. - The
userIdis the id for the author of the note. For now we are hardcoding it to123. Later we’ll be setting this based on the authenticated user. - Make a call to DynamoDB to put a new object with a generated
noteIdand the current date as thecreatedAt. - And if the DynamoDB call fails then return an error with the HTTP status code
500.
Let’s go ahead and install the npm packages that we are using here.
Run the following in the packages/functions/ folder.
$ npm install aws-sdk uuid
- aws-sdk allows us to talk to the various AWS services.
- uuid generates unique ids.
Deploy Our Changes
If you switch over to your terminal, you’ll notice that your changes are being deployed.
Note that, you’ll need to have sst dev running for this to happen. If you had previously stopped it, then running npx sst dev will deploy your changes again.
You should see that the new API stack has been deployed.
✓  Deployed:
   StorageStack
   ApiStack
   ApiEndpoint: https://5bv7x0iuga.execute-api.us-east-1.amazonaws.com
It includes the API endpoint that we created.
Test the API
Now we are ready to test our new API.
Head over to the API tab in the SST Console and check out the new API.
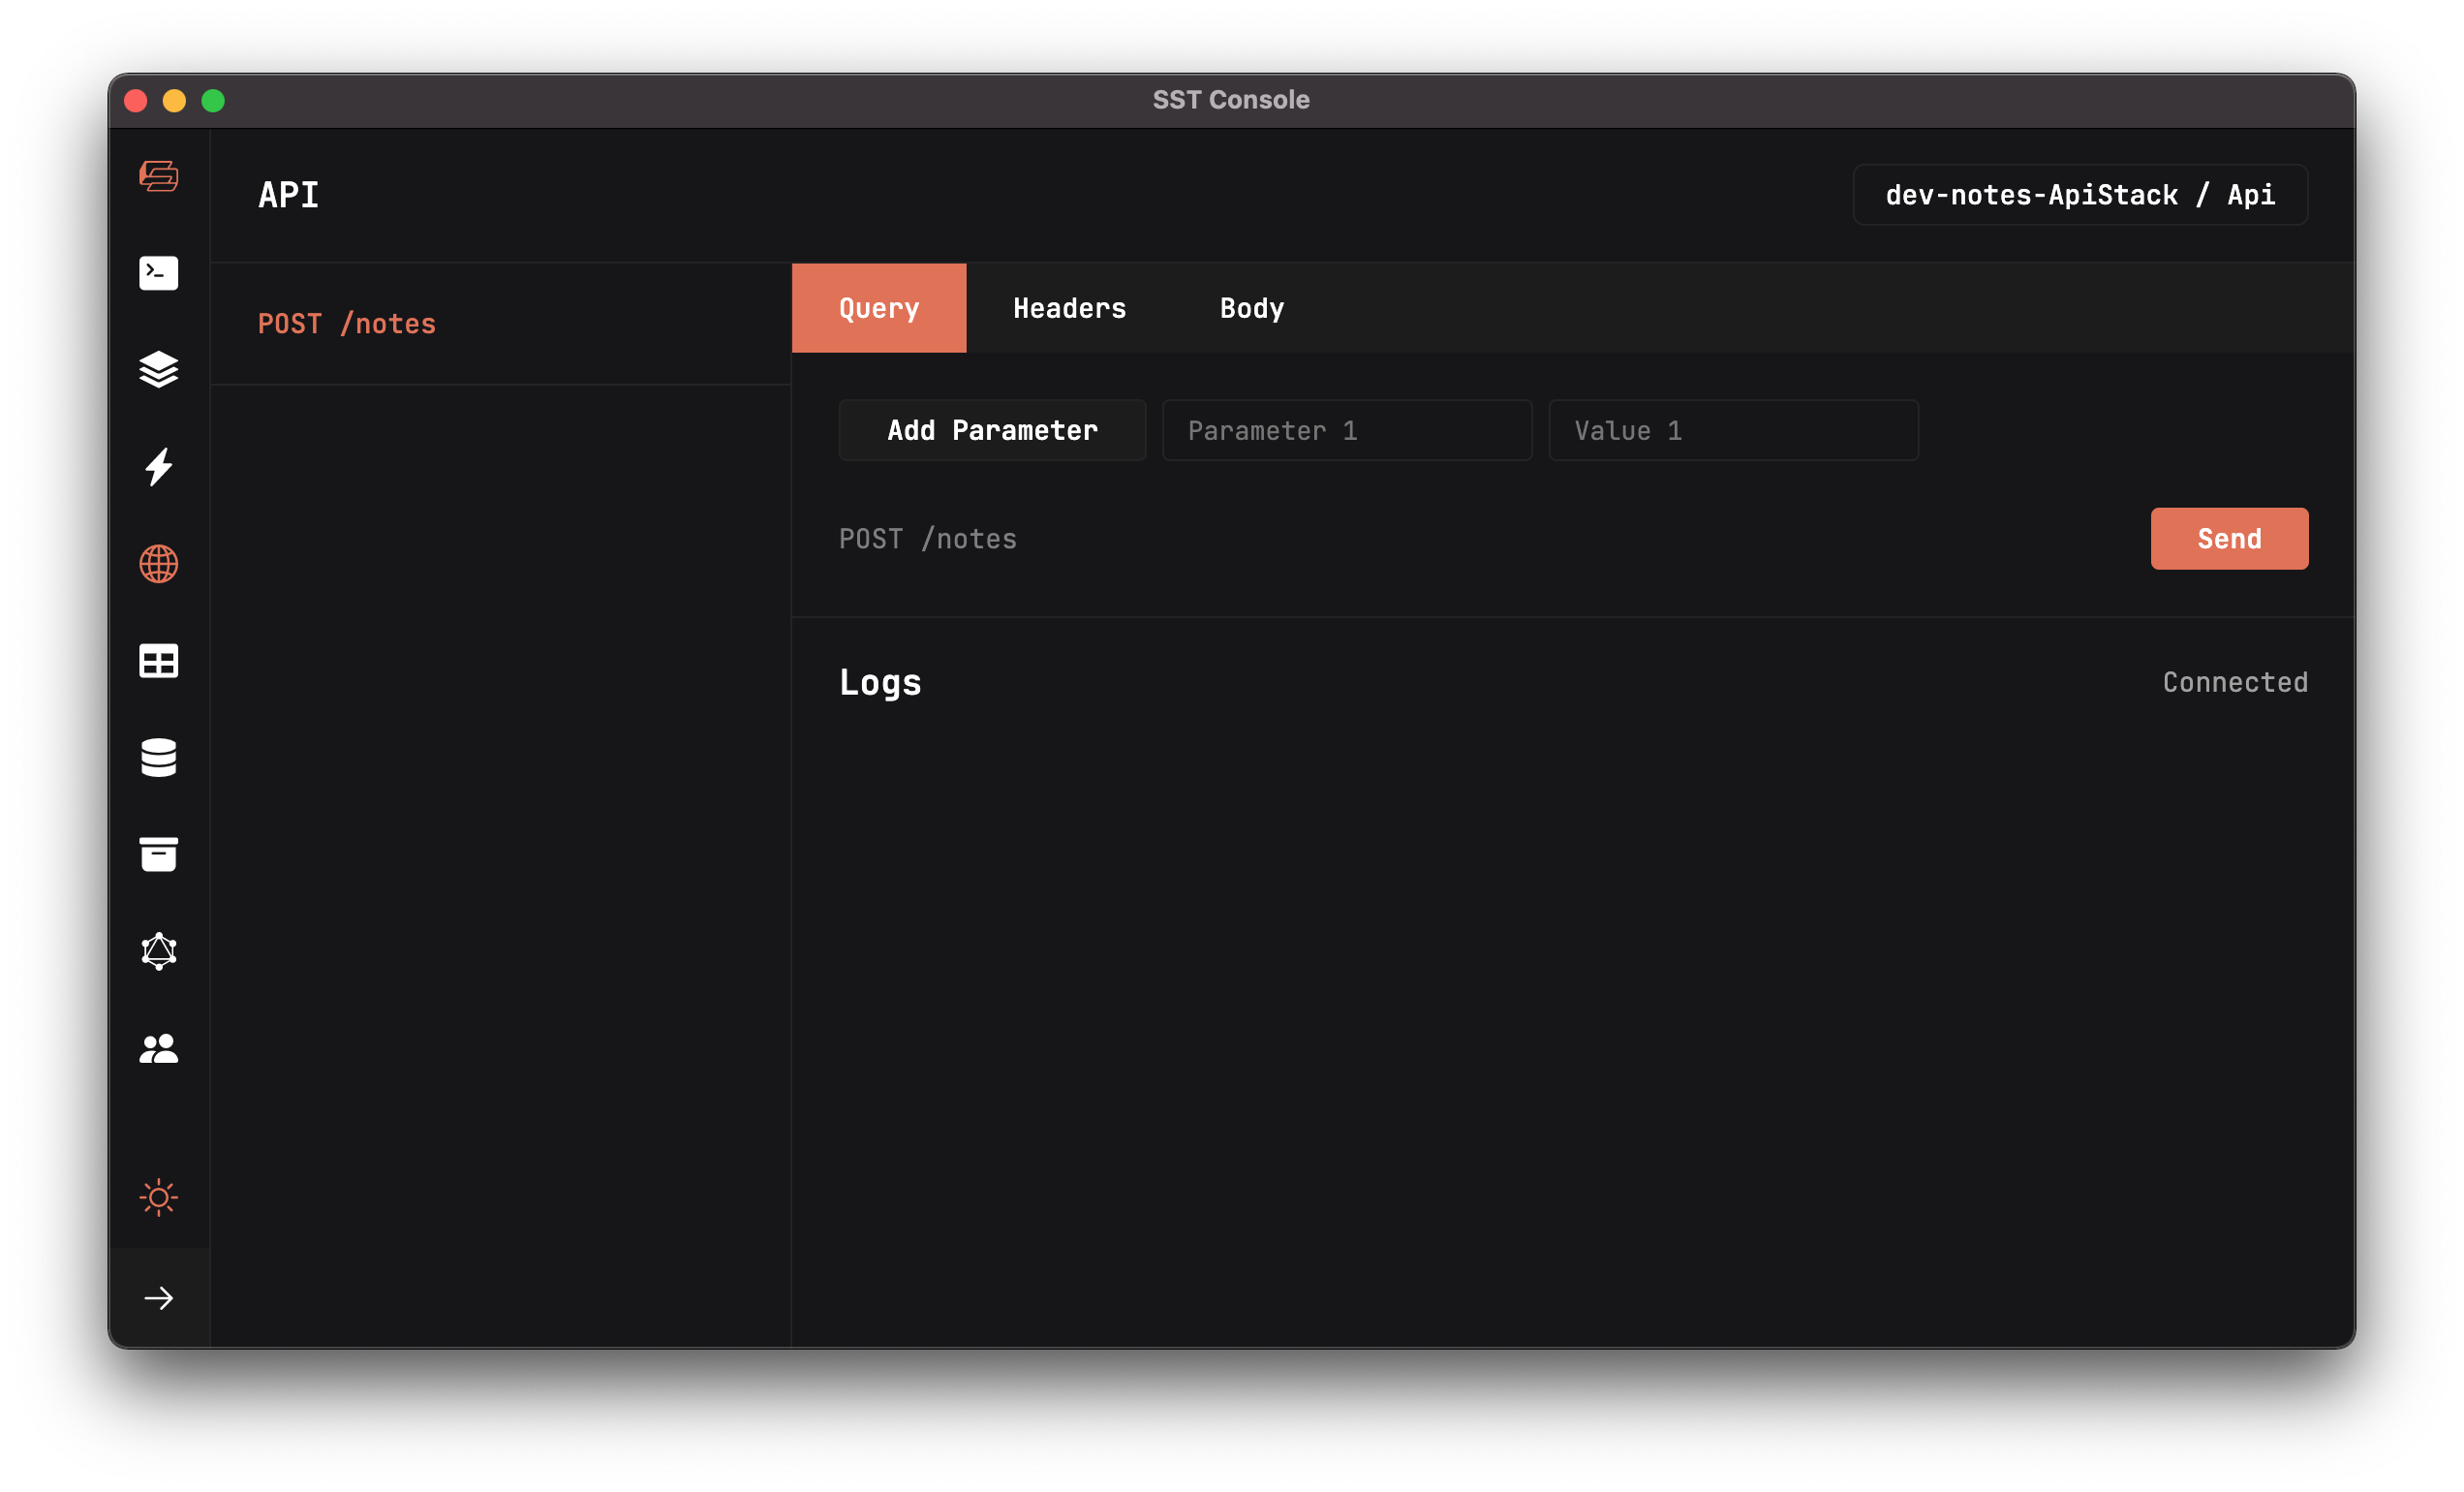
Here we can test our APIs.
Add the following request body to the Body field and hit Send.
{"content":"Hello World","attachment":"hello.jpg"}
You should see the create note API request being made.
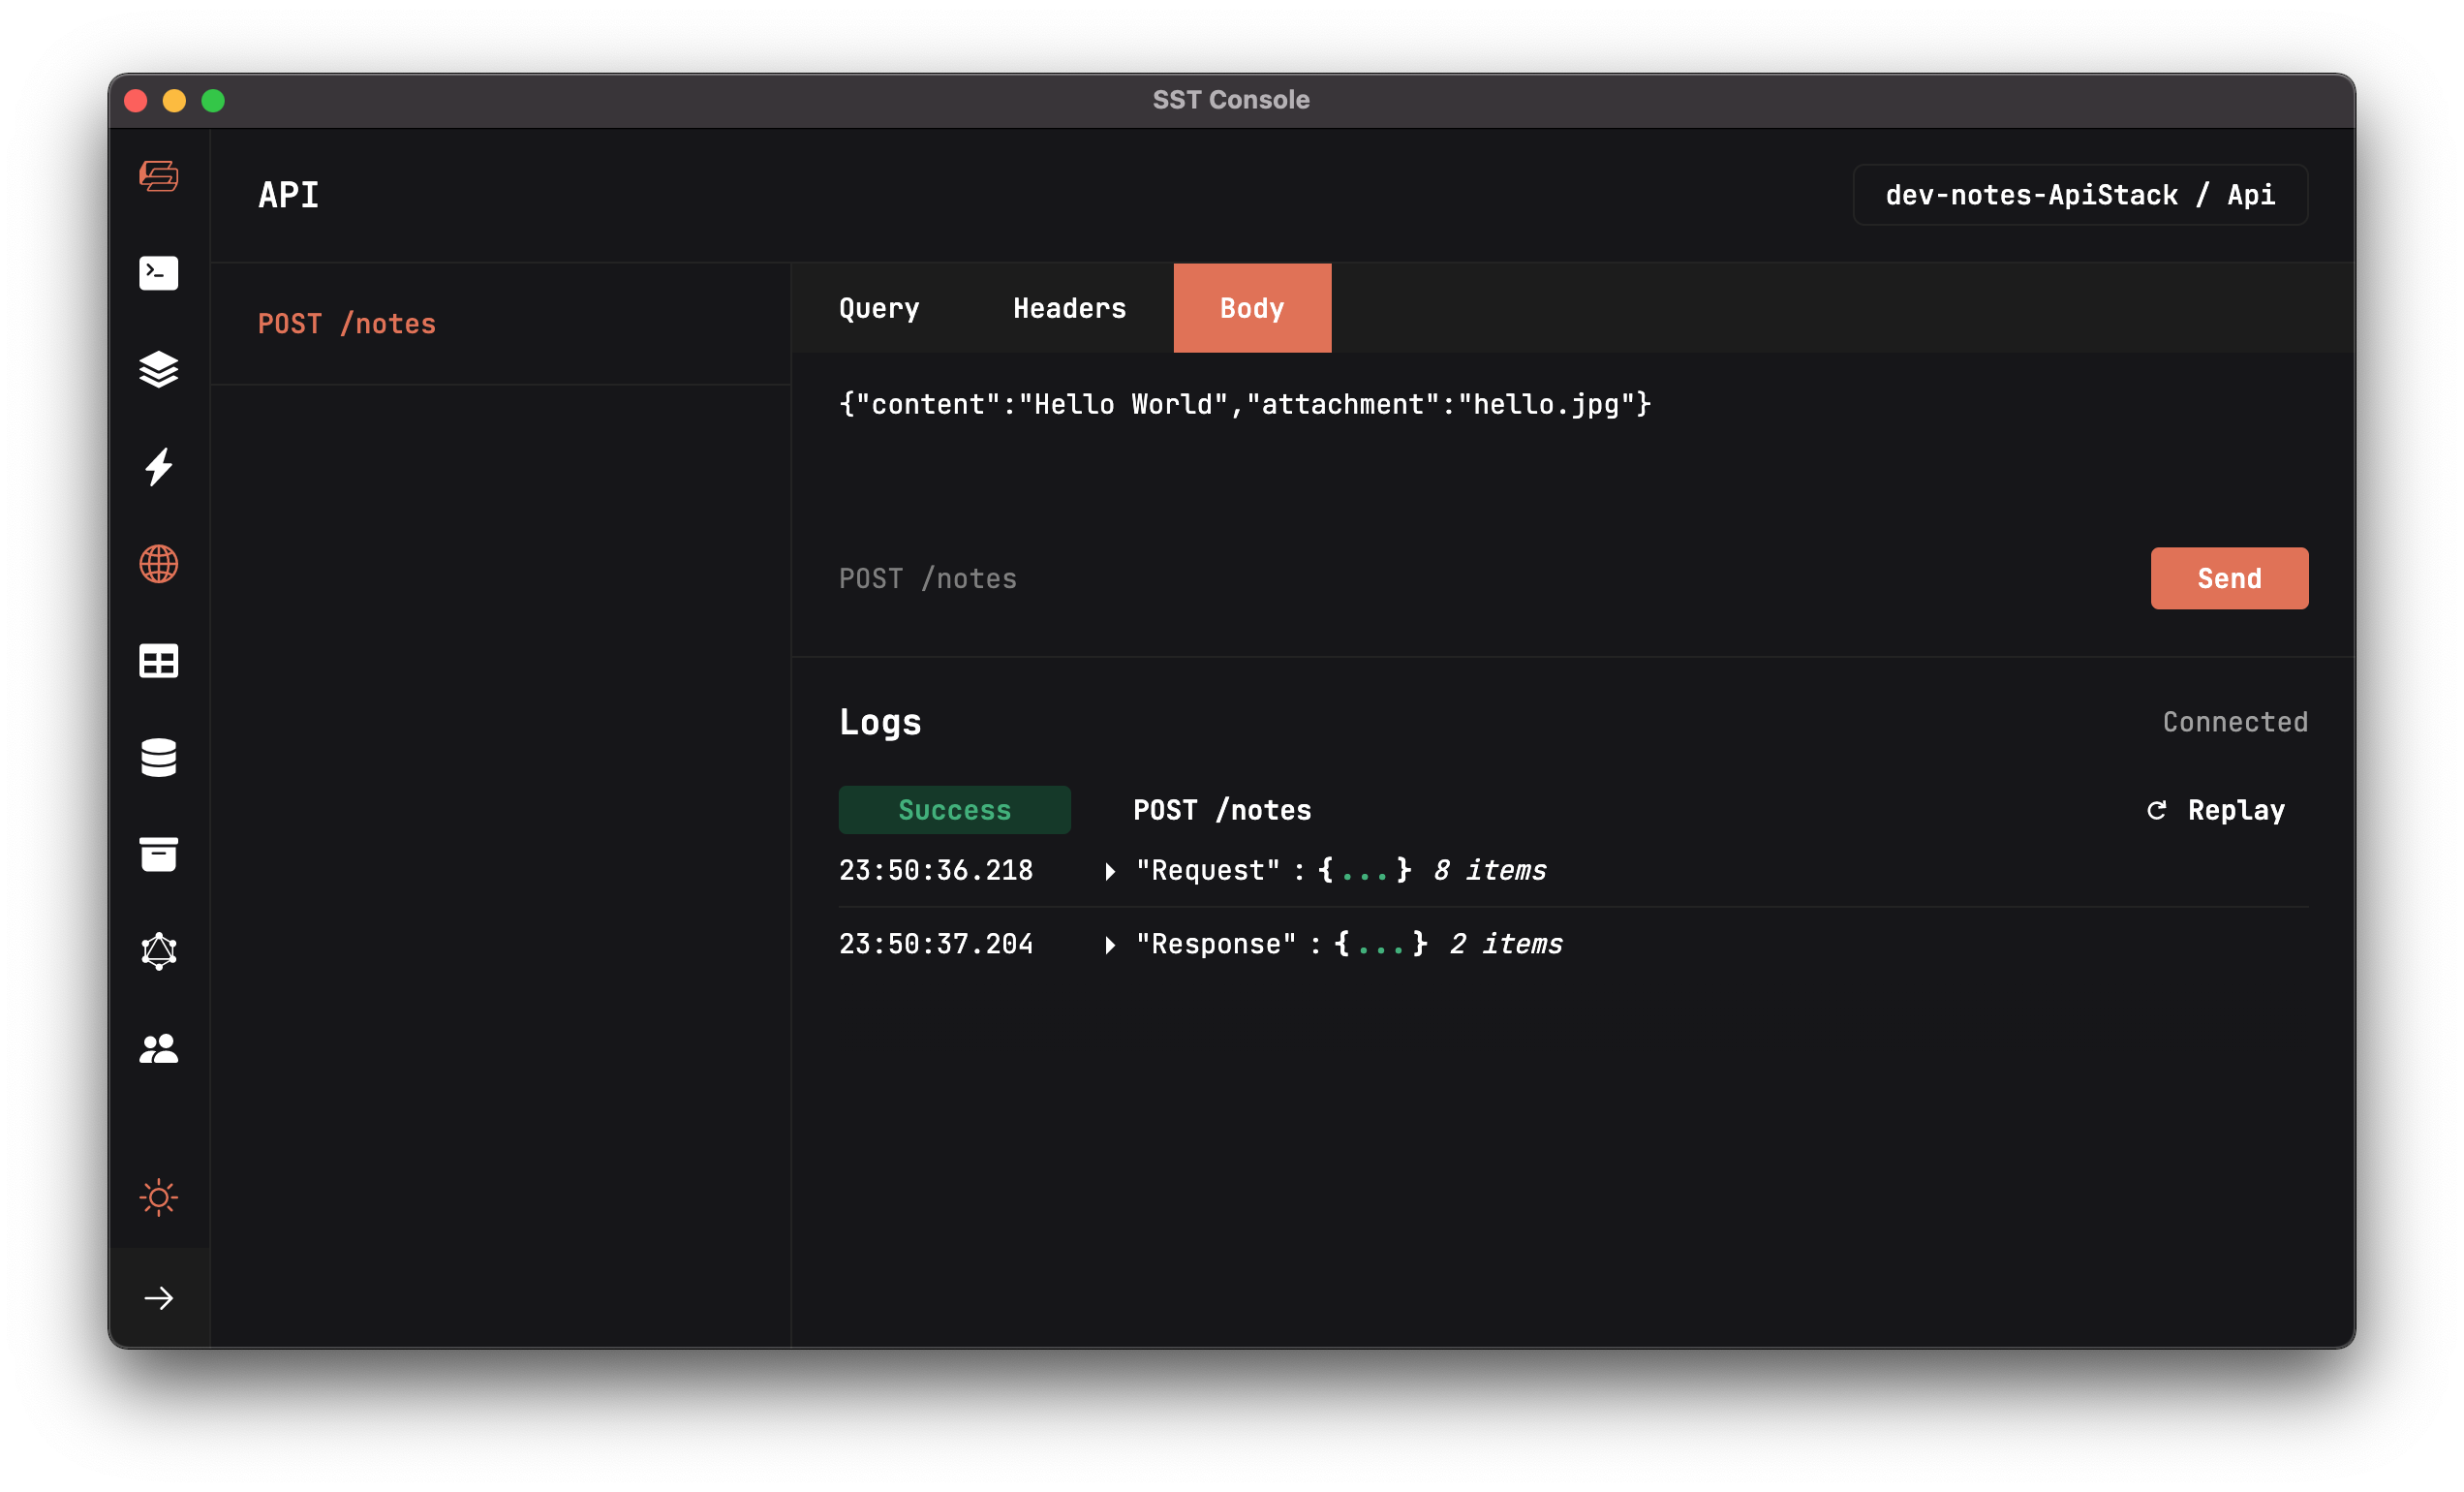
Here we are making a POST request to our create note API. We are passing in the content and attachment as a JSON string. In this case the attachment is a made up file name. We haven’t uploaded anything to S3 yet.
If you head over to the DynamoDB tab, you’ll see the new note.
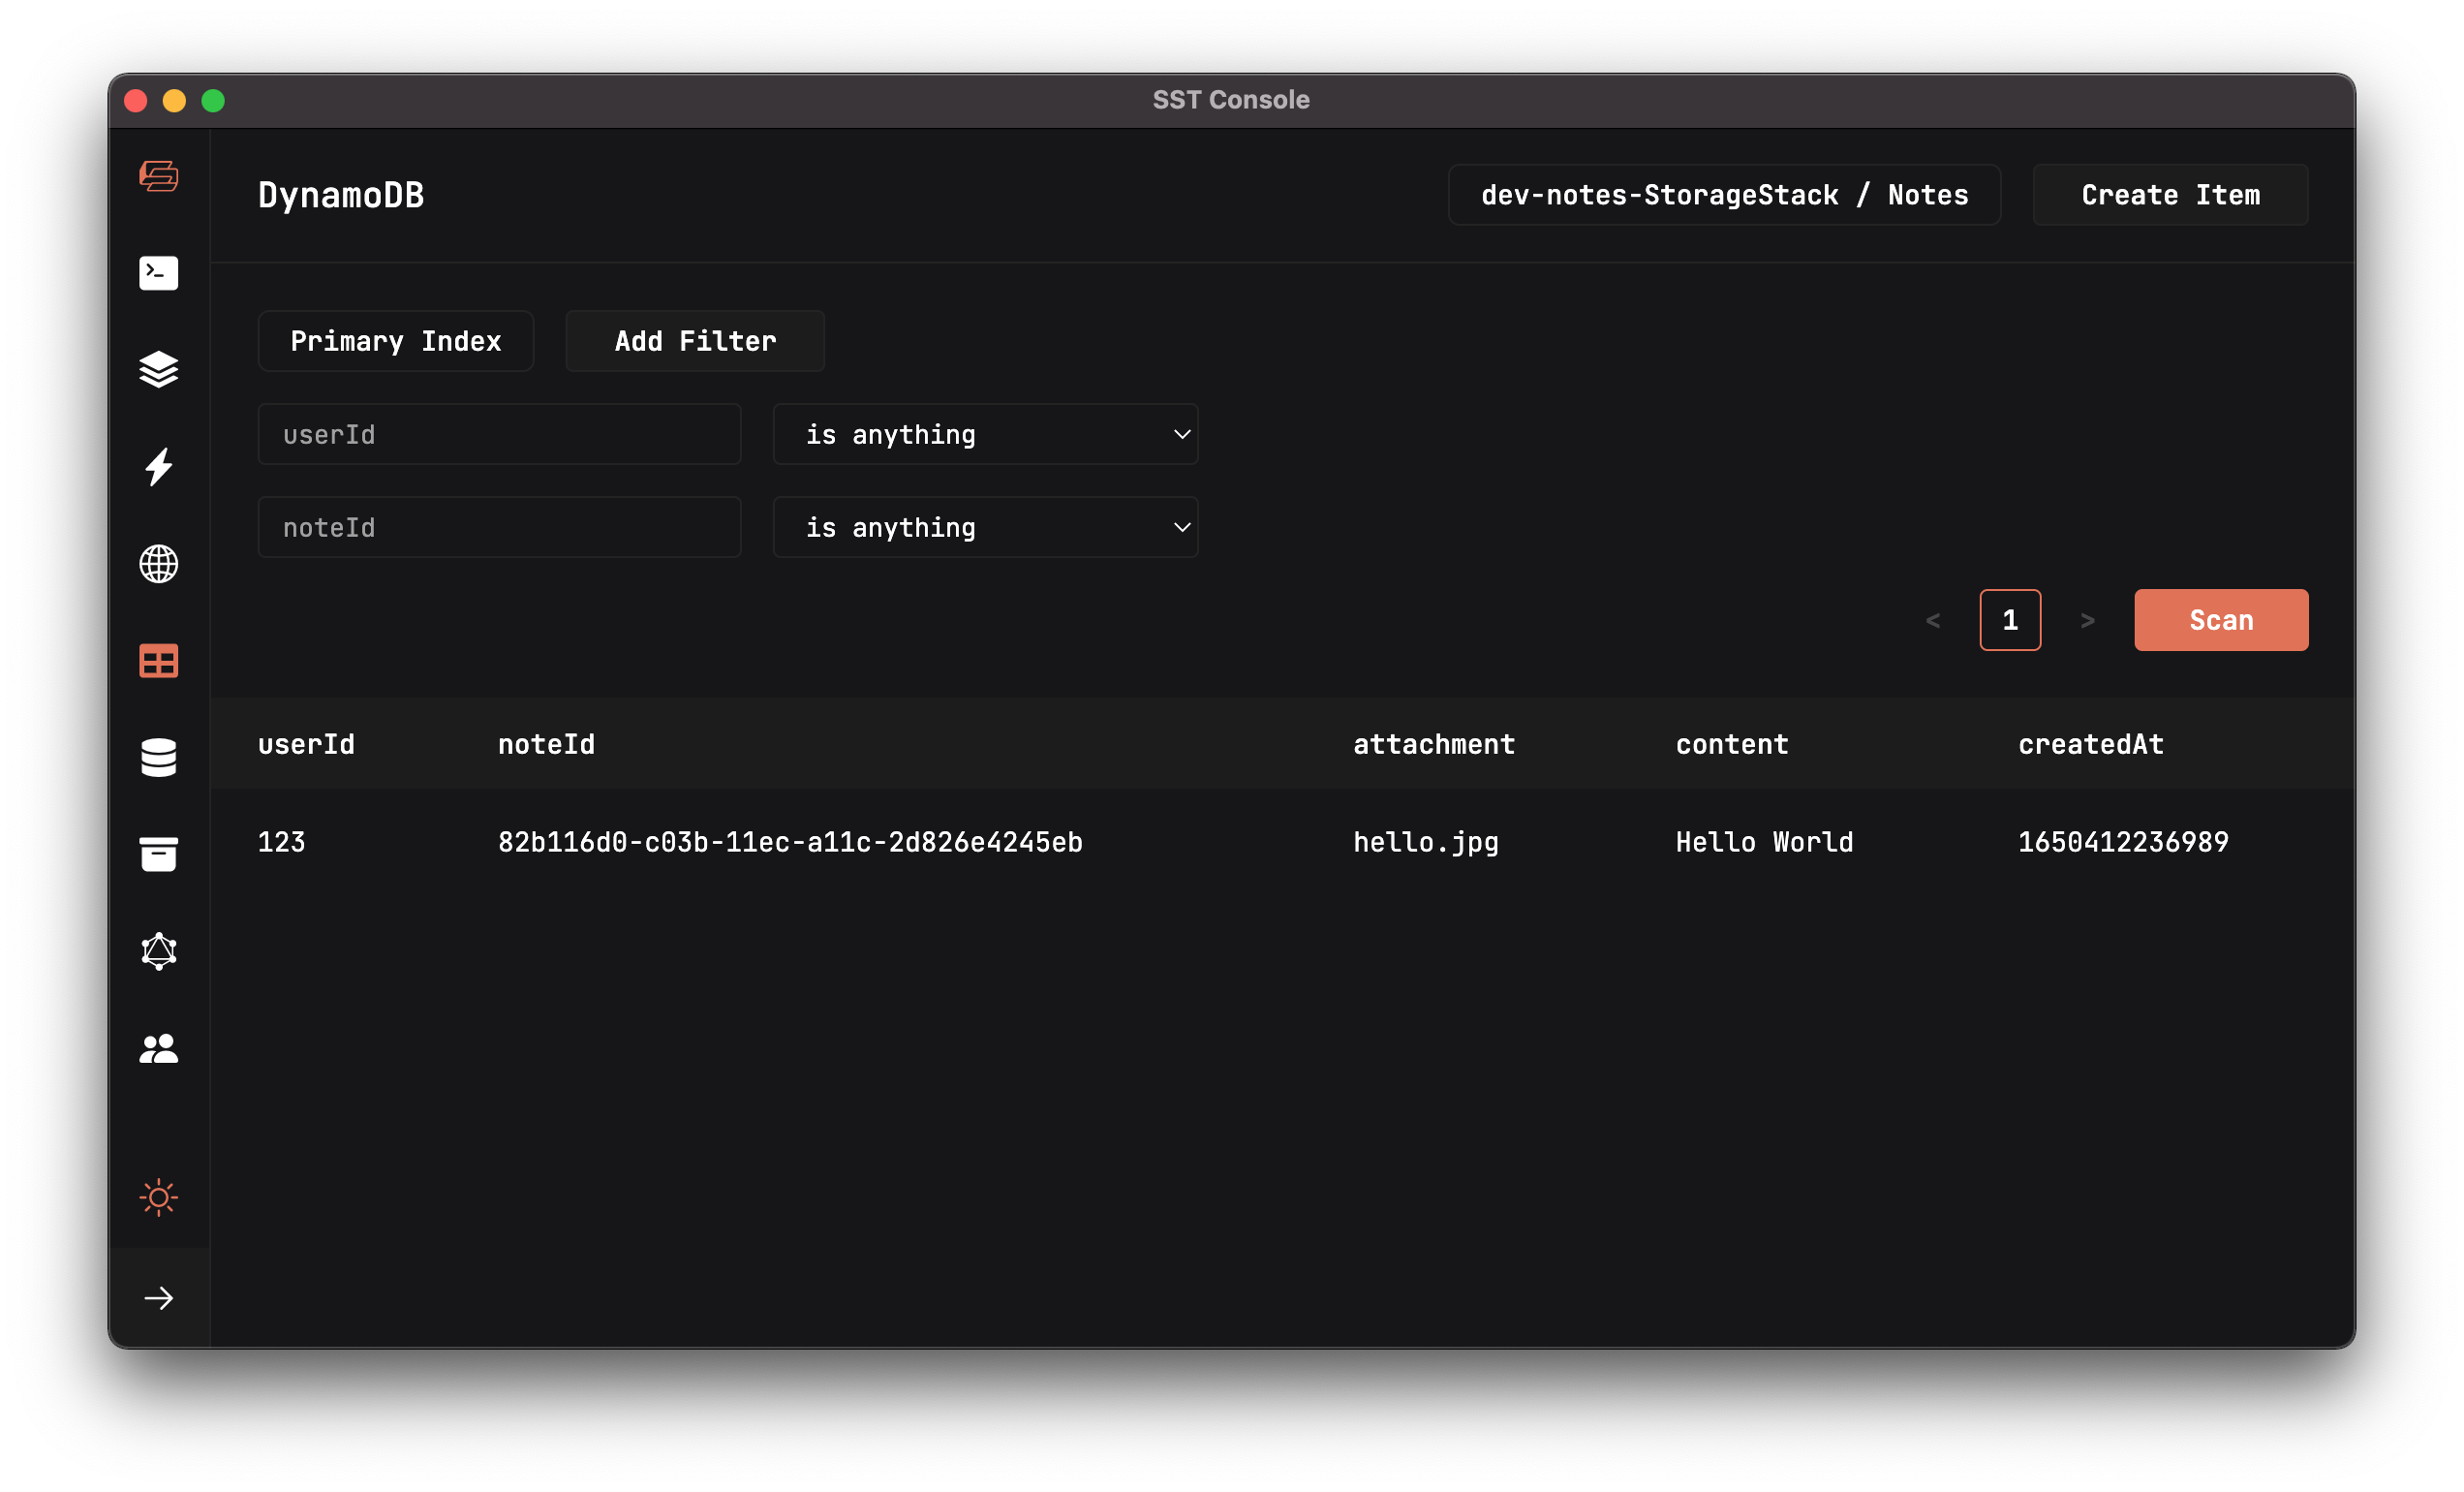
Make a note of the noteId. We are going to use this newly created note in the next chapter.
Refactor Our Code
Before we move on to the next chapter, let’s quickly refactor the code since we are going to be doing much of the same for all of our APIs.
Start by replacing our create.js with the following.
import { Table } from "sst/node/table";
import * as uuid from "uuid";
import handler from "@notes/core/handler";
import dynamoDb from "@notes/core/dynamodb";

export const main = handler(async (event) => {
  const data = JSON.parse(event.body);
  const params = {
    TableName: Table.Notes.tableName,
    Item: {
      // The attributes of the item to be created
      userId: "123", // The id of the author
      noteId: uuid.v1(), // A unique uuid
      content: data.content, // Parsed from request body
      attachment: data.attachment, // Parsed from request body
      createdAt: Date.now(), // Current Unix timestamp
    },
  };

  await dynamoDb.put(params);

  return params.Item;
});
This code doesn’t work just yet but it shows you what we want to accomplish:
- We want to make our Lambda function
async, and simply return the results. - We want to simplify how we make calls to DynamoDB. We don’t want to have to create a
new AWS.DynamoDB.DocumentClient(). - We want to centrally handle any errors in our Lambda functions.
- Finally, since all of our Lambda functions will be handling API endpoints, we want to handle our HTTP responses in one place.
Let’s start by creating a dynamodb util that we can share across all our functions. We’ll place this in the packages/core directory. This is where we’ll be putting all our business logic.
Create a packages/core/src/dynamodb.js file with:
import AWS from "aws-sdk";

const client = new AWS.DynamoDB.DocumentClient();

export default {
  get: (params) => client.get(params).promise(),
  put: (params) => client.put(params).promise(),
  query: (params) => client.query(params).promise(),
  update: (params) => client.update(params).promise(),
  delete: (params) => client.delete(params).promise(),
};
Here we are creating a convenience object that exposes the DynamoDB client methods that we are going to need in this guide.
Also create a packages/core/src/handler.js file with the following.
export default function handler(lambda) {
  return async function (event, context) {
    let body, statusCode;

    try {
      // Run the Lambda
      body = await lambda(event, context);
      statusCode = 200;
    } catch (e) {
      console.error(e);
      body = { error: e.message };
      statusCode = 500;
    }

    // Return HTTP response
    return {
      statusCode,
      body: JSON.stringify(body),
    };
  };
}
Let’s go over this in detail.
- We are creating a
handlerfunction that we’ll use as a wrapper around our Lambda functions. - It takes our Lambda function as the argument.
- We then run the Lambda function in a
try/catchblock. - On success, we
JSON.stringifythe result and return it with a200status code. - If there is an error then we return the error message with a
500status code.
It’s important to note that the handler.js needs to be imported before we import anything else. This is because we’ll be adding some error handling to it later that needs to be initialized when our Lambda function is first invoked.
Next, we are going to add the API to get a note given its id.
Common Issues
-
Response
statusCode: 500If you see a
statusCode: 500response when you invoke your function, the error has been reported by our code in thecatchblock. You’ll see aconsole.erroris included in ourhandler.jscode above. Incorporating logs like these can help give you insight on issues and how to resolve them.} catch (e) { // Prints the full error console.error(e); body = { error: e.message }; statusCode = 500; }
For help and discussion
Comments on this chapter